Hi, Soan-
I'm looking at this now.
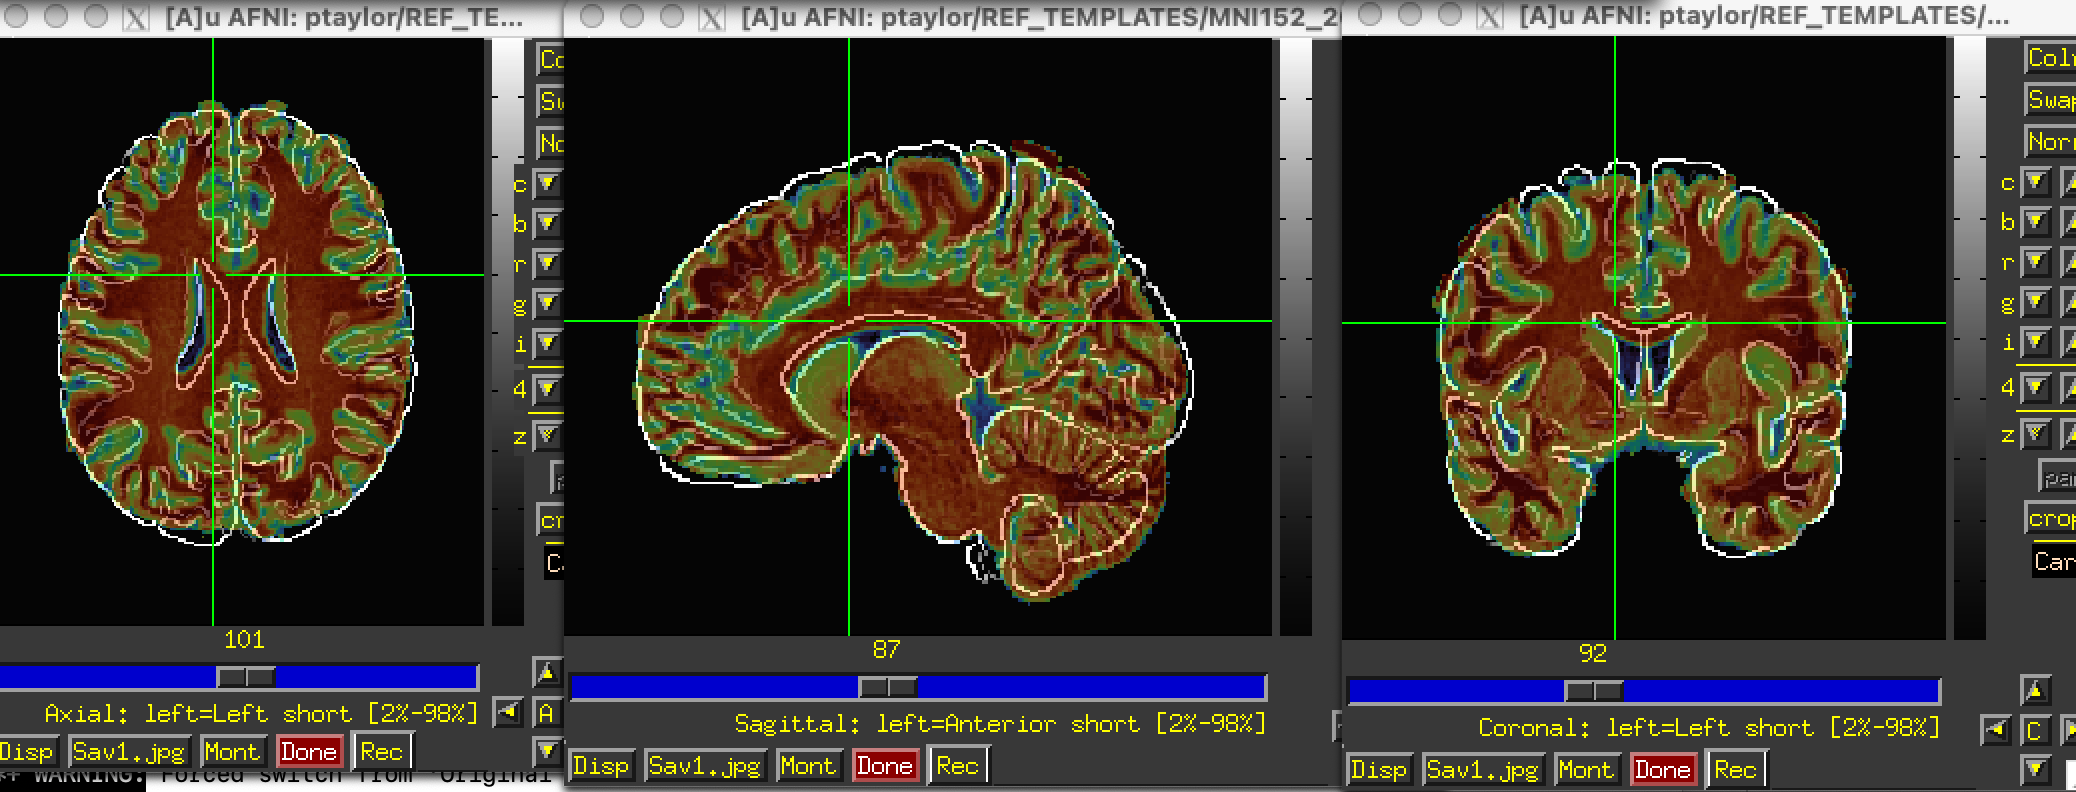
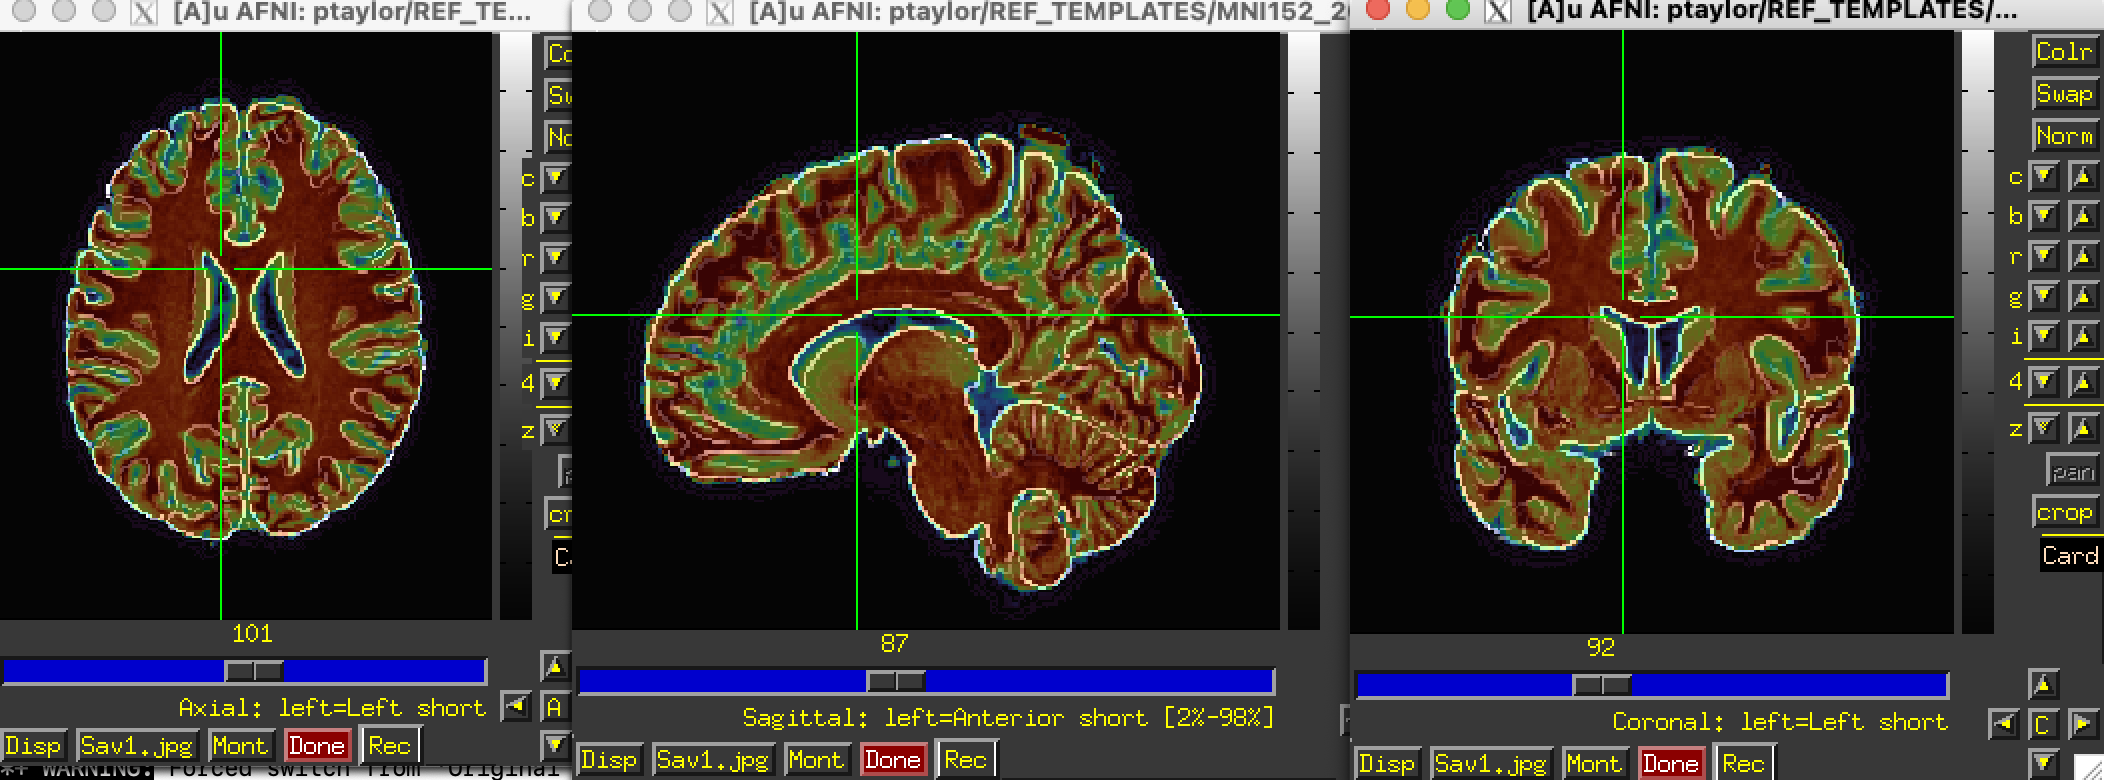
In the results_afni_warp/awpy/ directory created by auto_warp.py, both the affine and nonlinear warp results to template look pretty reasonable (in each case, the MNI template is underlayed and edgified by hitting the "e" key when hovering over the image window; note whatever skullstripping was applied left some non-brain stuff hanging on at the top of the brain, but that doesn't affect too much here):
- affine result as overlay:
- nonlinear result as overlay
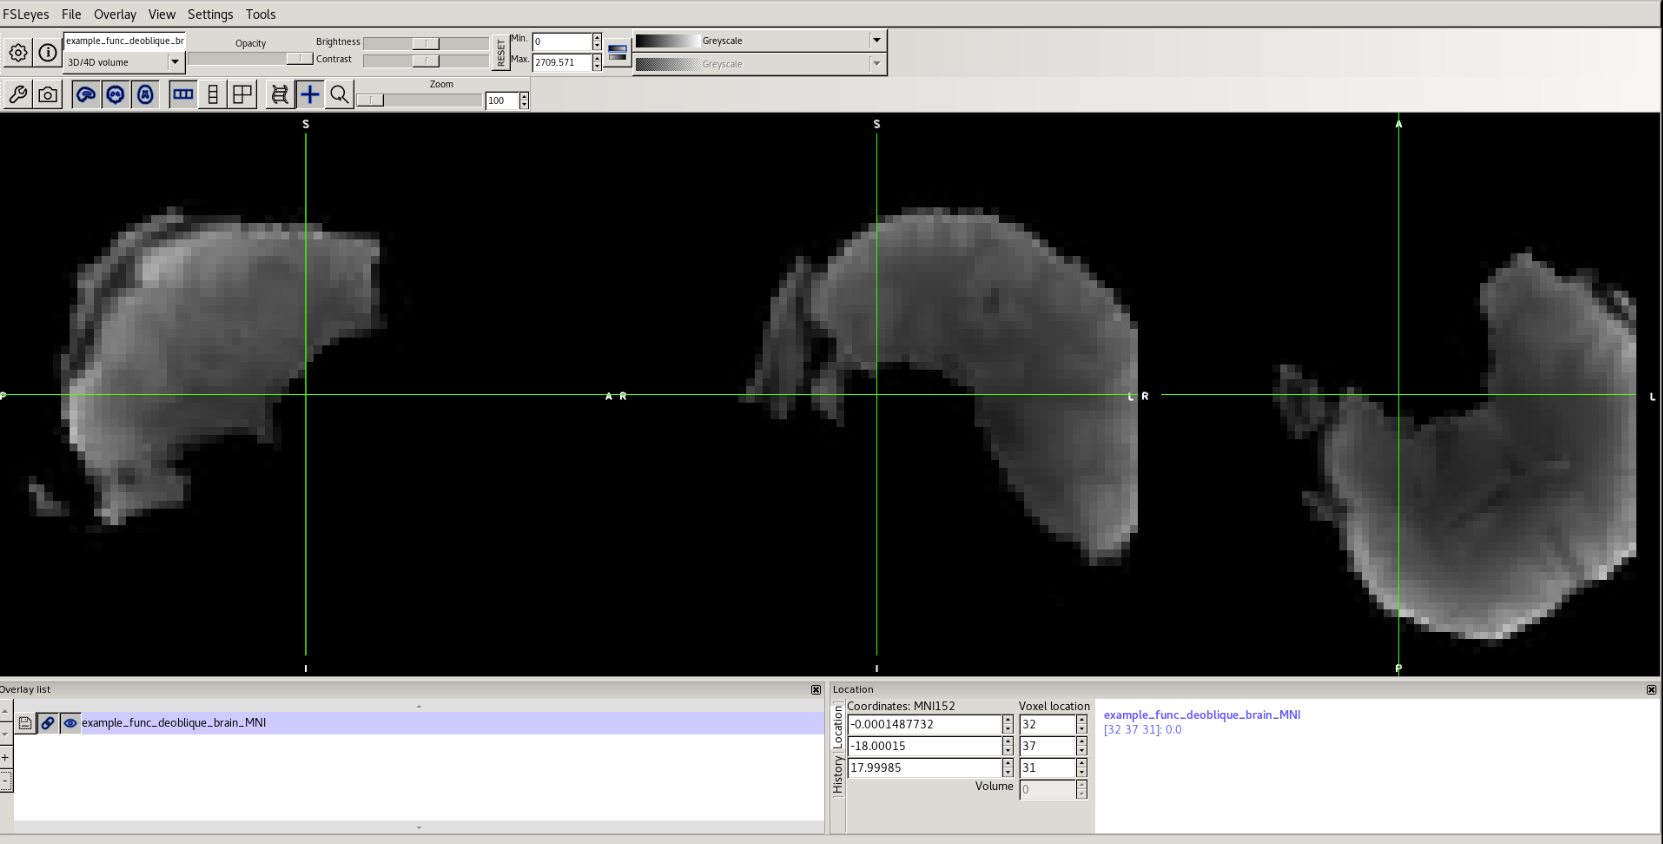
However, I still don't see why the anatomical has obliquity in it? We generally recommend removing that, such as with:
adjunct_deob_around_origin \
    -input output_brain.nii \
    -prefix output_brain_DEOB.nii
I did this on my computer with your data to work with that instead.
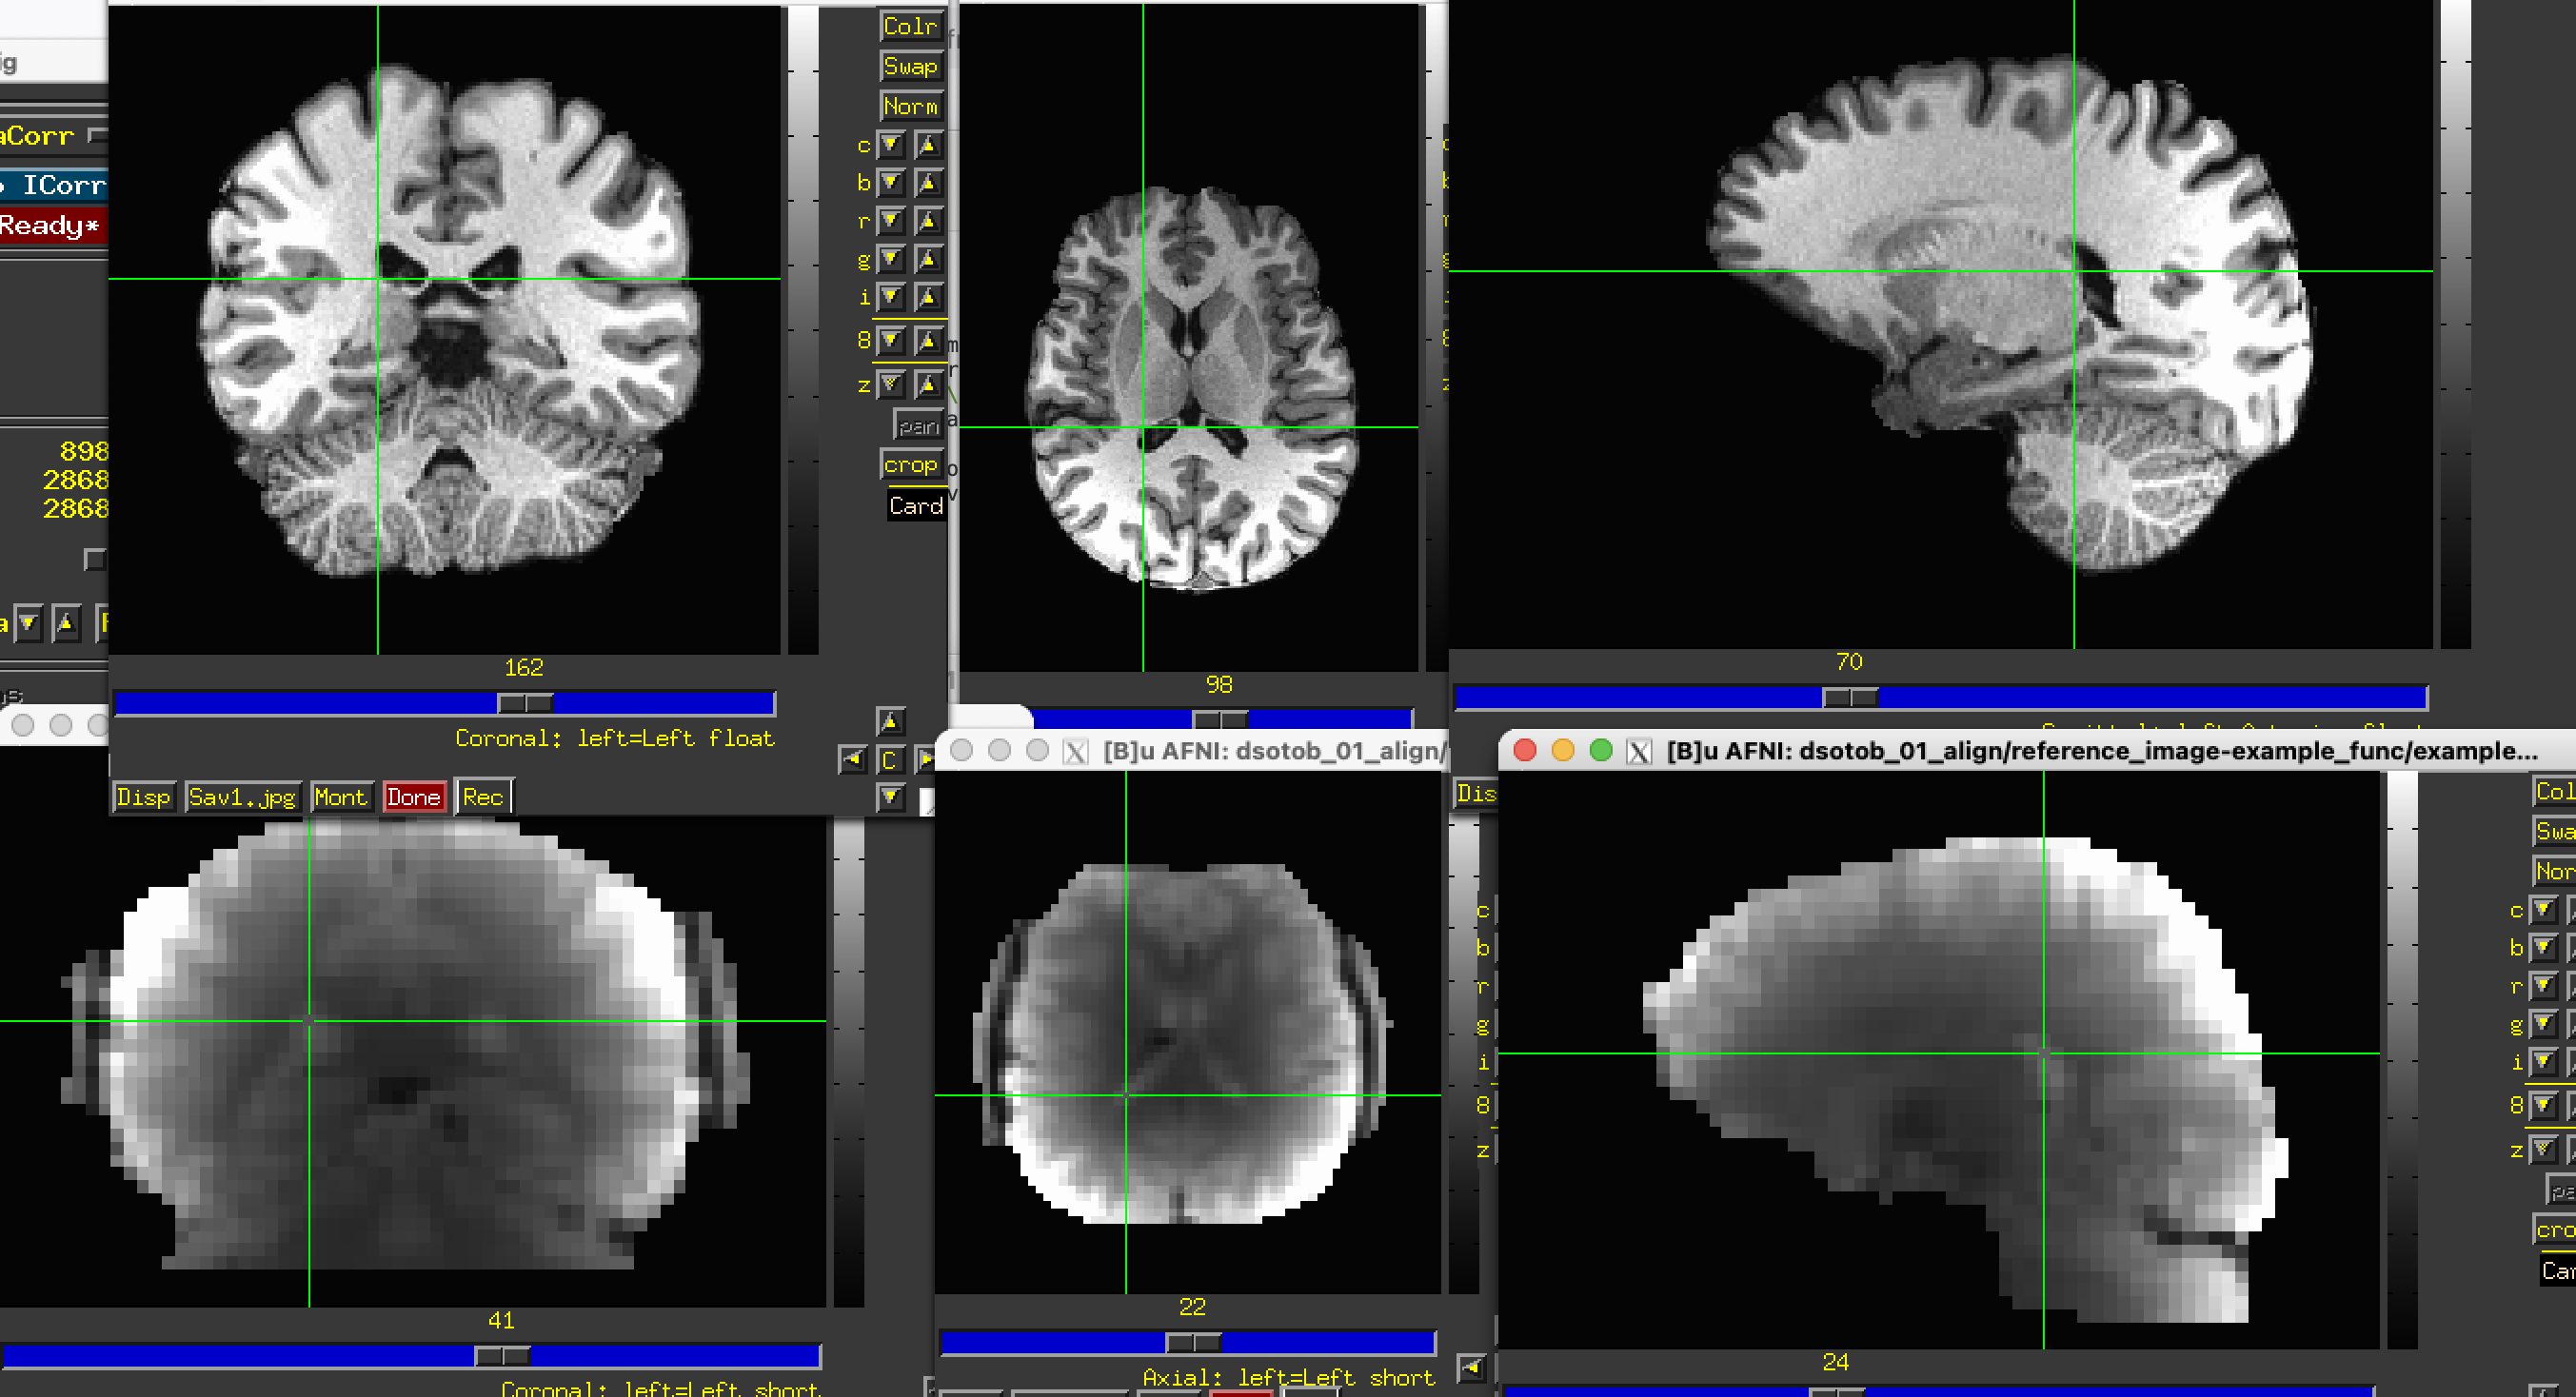
Re. the EPI-anatomical alignment:
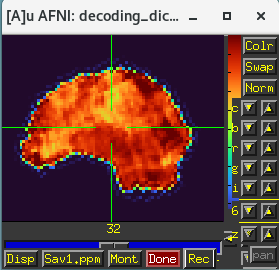
The initial overlay of the datasets is good, which helps a lot. However, there is very little contrast in the EPI, and then there are large brightness inhomogeneities across it, esp. around the edges:
I think that is throwing off the cost function-based alignment. Indeed, when I run:
align_epi_anat.py \
    -anat2epi -giant_move \
    -anat T1/output_brain_DEOB.nii \
    -suffix _al_epi2 \
    -epi reference_image-example_func/example_func_deoblique_brain.nii \
    -epi_base 0   \
    -anat_has_skull no \
    -epi_strip None -volreg off -tshift off -overwrite
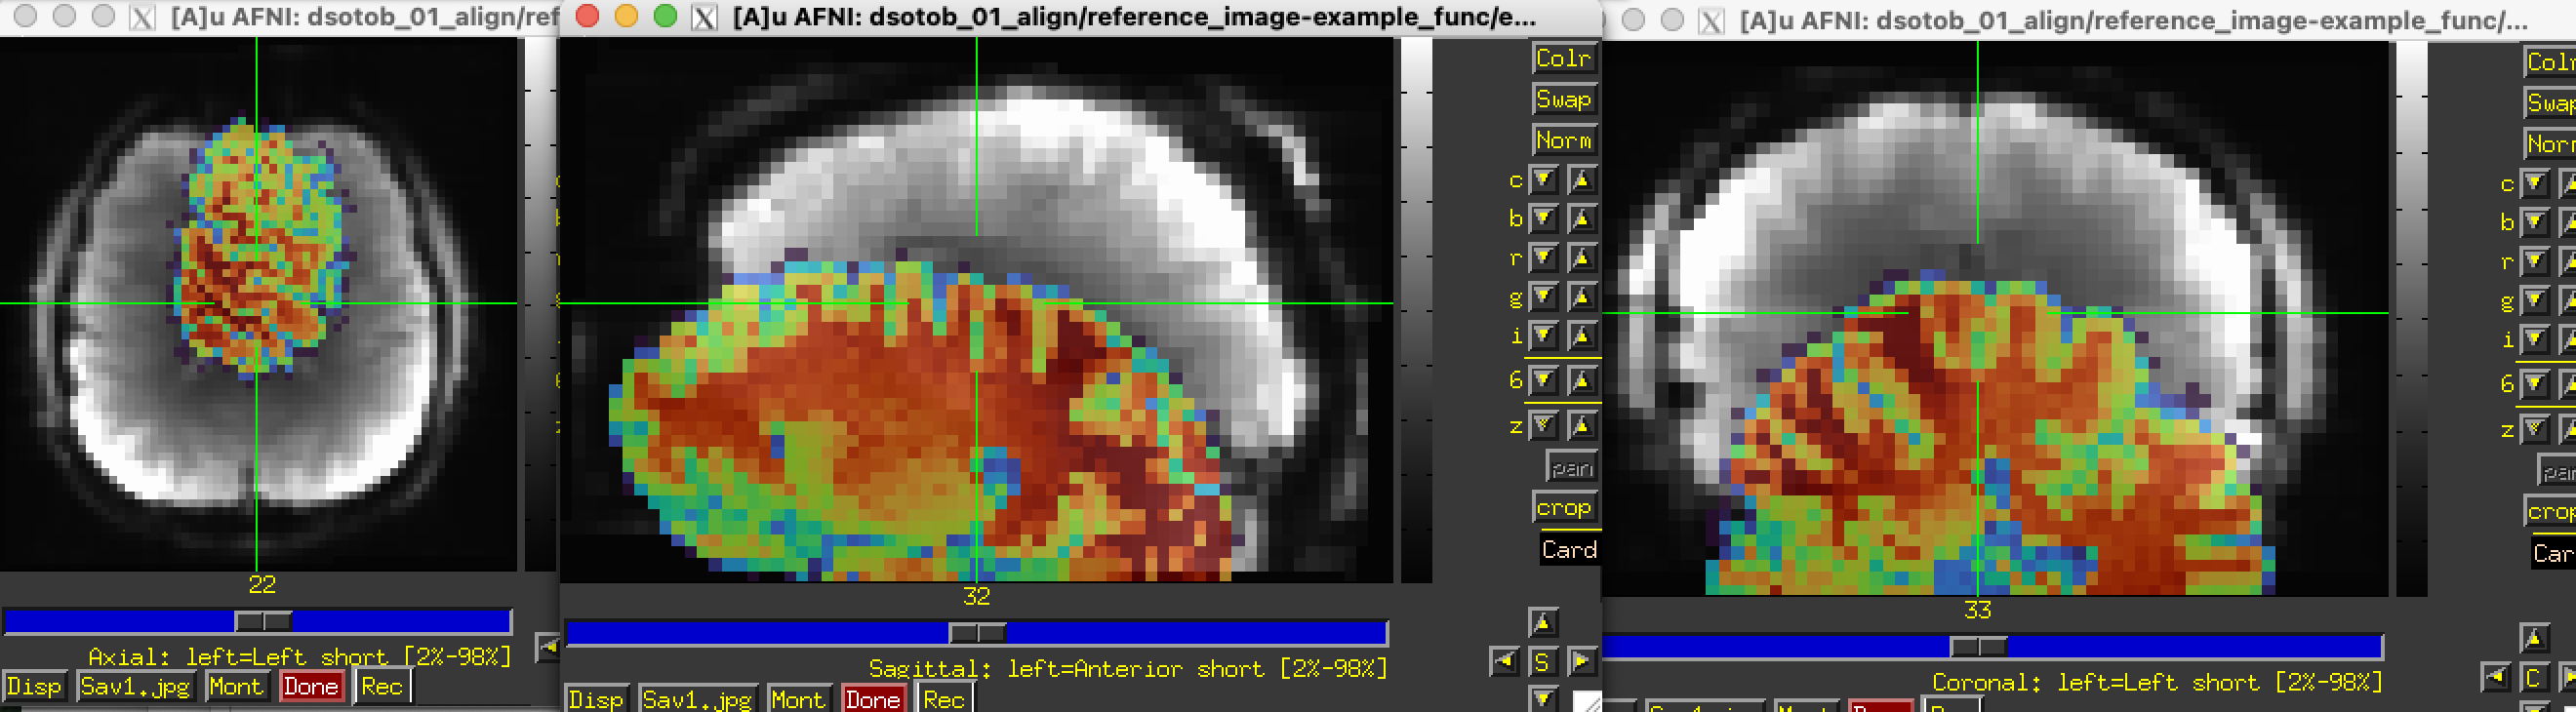
... the resulting alignment doesn't look good (EPI underlay, "aligned" anatomical overlay):
We have a program called 3dLocalUnifize that we use a lot via afni_proc.py to help with EPI-anatomical alignment in such cases. When I apply that to your EPI:
3dLocalUnifize \
    -input reference_image-example_func/example_func_deoblique_brain.nii'[0]' \
    -prefix epi_base_vol0_LU.nii
Using that result for alignment:
align_epi_anat.py \
    -anat2epi -giant_move \
    -anat T1/output_brain_DEOB.nii \
    -suffix _al_epi3 \
    -epi epi_base_vol0_LU.nii  \
    -epi_base 0   \
    -anat_has_skull no \
    -epi_strip None -volreg off -tshift off -overwrite
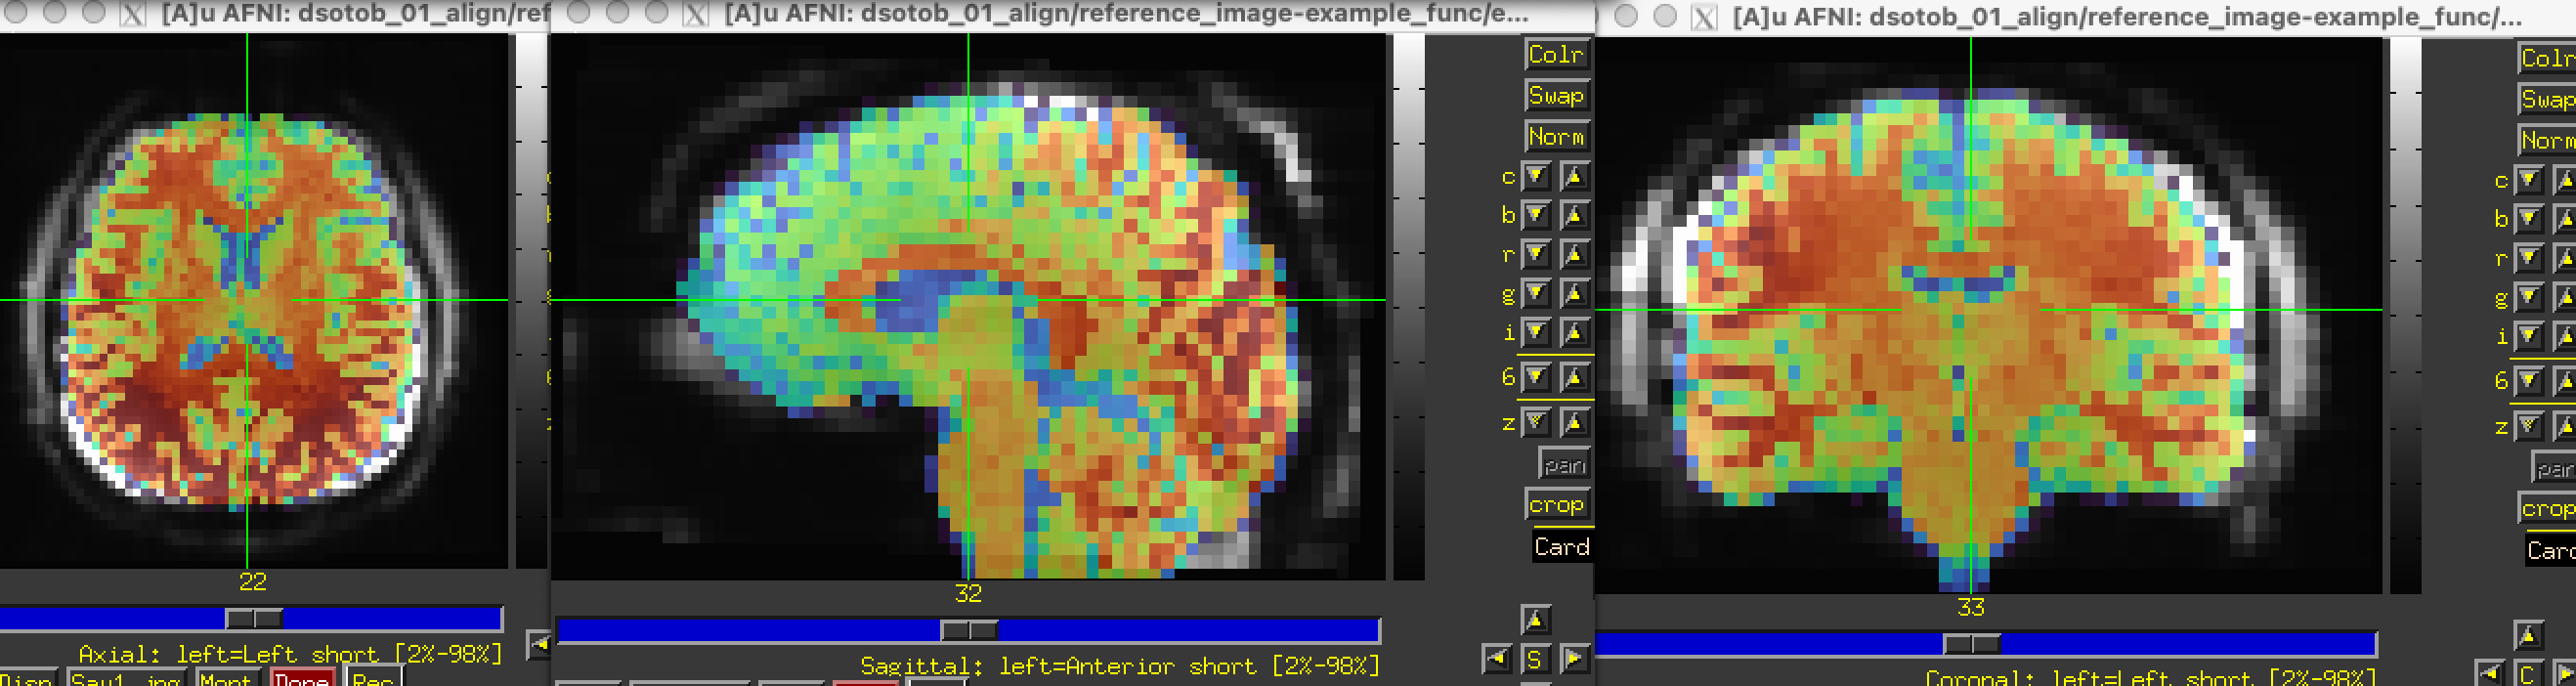
... produces better alignment:
And note you can actually do all this alignment estimation and concatenation within afni_proc.py. That is actually done in Ex. 1 of the afni_proc.py description paper. For the dataset here, which doesn't have blip up/down datasets to use for EPI distortion correction, this could look like the following where I have:
- made
AAA.nii a fake time series dataset, because the other EPI provided is not actually a time series dataset
- the EPI itself does not need to be deobliqued---
afni_proc.py will handle that fine
- I did deoblique the anatomical, as above, because it should be.
- It includes the local unifizing step with 3dLocalUnifize
#!/bin/tcsh


set subj    = sub-000
set anat_cp = T1/output_brain_DEOB.nii
set dset_epi = reference_image-example_func/AAA.nii
#reference_image-example_func/example_func_deoblique.nii

set template = MNI152_2009_template.nii.gz

set nt_rm = 0
set final_dxyz = 3


afni_proc.py                                                                \
    -subj_id                  ${subj}                                       \
    -dsets                    ${dset_epi}                                   \
    -copy_anat                ${anat_cp}                                    \
    -anat_has_skull           no                                            \
    -blocks                   align tlrc volreg regress                     \
    -tcat_remove_first_trs    ${nt_rm}                                      \
    -align_unifize_epi        local                                         \
    -align_opts_aea           -cost lpc+ZZ -giant_move -check_flip          \
    -tlrc_base                ${template}                                   \
    -tlrc_NL_warp                                                           \
    -volreg_align_to          MIN_OUTLIER                                   \
    -volreg_align_e2a                                                       \
    -volreg_tlrc_warp                                                       \
    -volreg_warp_dxyz         ${final_dxyz}
On a final note, I see you link the MNI template dataset, I guess to not need to copy it around? You don't need to with AFNI---you can provide a folder location to always be loaded when you open the GUI, and which will be searched for files. You do this by setting an environment variable in the the settings-control file ~/.afnirc. On my computer, I have these two variables pointing at that special folder, which you can do analogously on your computer:
AFNI_GLOBAL_SESSION = /Users/ptaylor/REF_TEMPLATES
AFNI_ATLAS_PATH     = /Users/ptaylor/REF_TEMPLATES
This is described in this AFNI Academy tutorial video on setup.
--pt